
8 min read
Deno 1.0 Released! REST API Example
Deno has officially released and version 1.0.0 is now available! If you have no idea what Deno is, check out this video where I go through all of the details.
In this article, I want to show you how to create a simple, easy REST API using Deno. My good friend Flavio put together an awesome blog on his site that outlines all the details on Deno. I'm going to use one of his examples where he uses Oak and Deno to create a simple REST API.
Oak is a middleware framework similar to Koa.
So here's a high-level overview of what we are going to do:
- Install Deno
- Create the API to perform basic CRUD operations (Create/Read/Update/Delete)
- Store, in memory, a list of dogs with their name and age
- Get all dogs
- Get a specific dog
- Add a new dog
- Update an existing dog
- Remove a dog
Throughout the process we are going to use a program called Insomnia to test our API. Insomnia is similar to Postman.
Flavio uses TypeScript in his blog, but I'm going to use vanilla JavaScript. Just so you can see that it's easy to do it either way.
Installation
Installation is pretty easy.
Shell:
`curl -fsSL <https://deno.land/x/install/install.sh> | sh`
PowerShell:
`iwr <https://deno.land/x/install/install.ps1> -useb | iex`
Homebrew (macOS or Linux):
`brew install deno`
Chocolatey (Windows):
`choco install deno`
Now we can check to make sure it's installed and working. Just type deno --version
Setup
Now we'll create a new file, app.js, and we'll import the Application and Router objects from Oak.
`import { Application, Router } from '<https://deno.land/x/oak/mod.ts>'`
Now let's add some environmental variables for PORT and HOST:
const env = Deno.env.toObject()const PORT = env.PORT || 4000const HOST = env.HOST || '127.0.0.1'
So, the app is going to run on localhost:4000. Now we'll create the Oak application:
const router = new Router()const app = new Application()app.use(router.routes())app.use(router.allowedMethods())console.log(`Listening on port ${PORT}...`)await app.listen(`${HOST}:${PORT}`)
So now we should have an app listening. It doesn't do anything yet though.
Run
In order to run this, we need to include two flags. This is because by default Deno is secure by default. Everything is turned off and you have to specifically turn on things you need to access.
--allow-envgives access to the environmental variables--allow-netgives access to the network
`deno run --allow-env --allow-net app.js`
During the first run, Deno will download and cache all of the dependencies. The following times you run the app, Deno will skip the downloads because those packages are already cached. Just a reminder, since all of this is new, Deno does not store the packages inside a node_modules folder. They are downloaded and cached globally for all projects.
So now it's listening on port 4000, but again, it doesn't do anything at this point.
The Database
Now we'll add the database, which in this example is just going to be an array that will be stored in memory. So, if we restart the server, any changes to the database will be lost. In an actual application you would use a real database, such as PostgreSQL or Mongo.
let dogs = [ { name: 'Roger', age: 8, }, { name: 'Syd', age: 7, },]
API Frame
So now we'll actually start implementing the API. We will have several functions that will be invoked dependent on the endpoint.
const router = new Router()router .get('/dogs', getDogs) .get('/dogs/:name', getDog) .post('/dogs', addDog) .put('/dogs/:name', updateDog) .delete('/dogs/:name', removeDog)
Here we are defining what will happen at each endpoint.
Get All Dogs
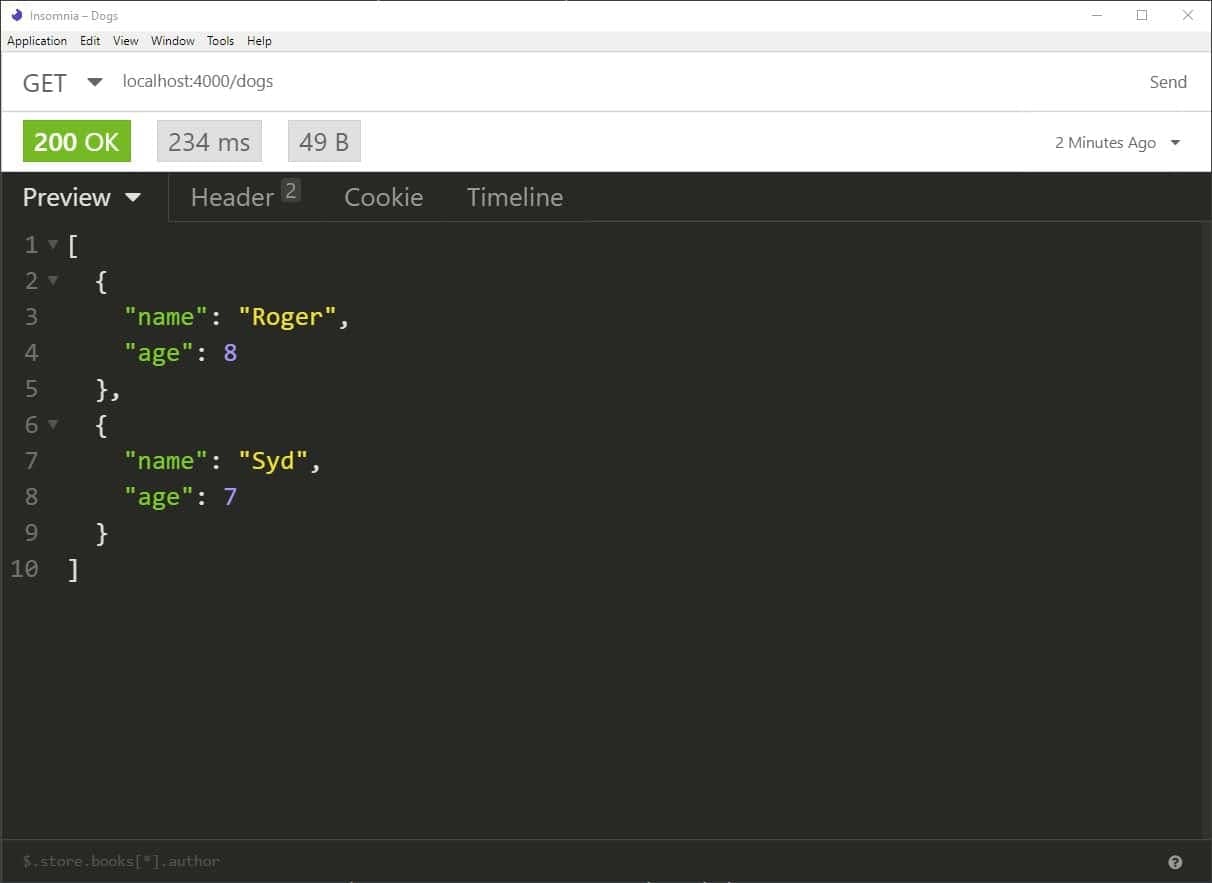
We'll implement each of these actions starting with getting all dogs. This will return a JSON object with a list of all of the dogs.
export const getDogs = ({ response }) => response.body = dogs
Let's save the app and restart the server. Now we can test the API in Insomnia. So we'll GET from localhost:4000/dogs, and we should see the full list of dogs.
Get Single Dog
Now we'll write the function to retrieve a single dog by name:
export const getDog = ({ params, response }) => { const dog = dogs.filter((dog) => dog.name === params.name) if (dog.length) { response.status = 200 response.body = dog[0] return } response.status = 400 response.body = { msg: `Cannot find dog ${params.name}` }}
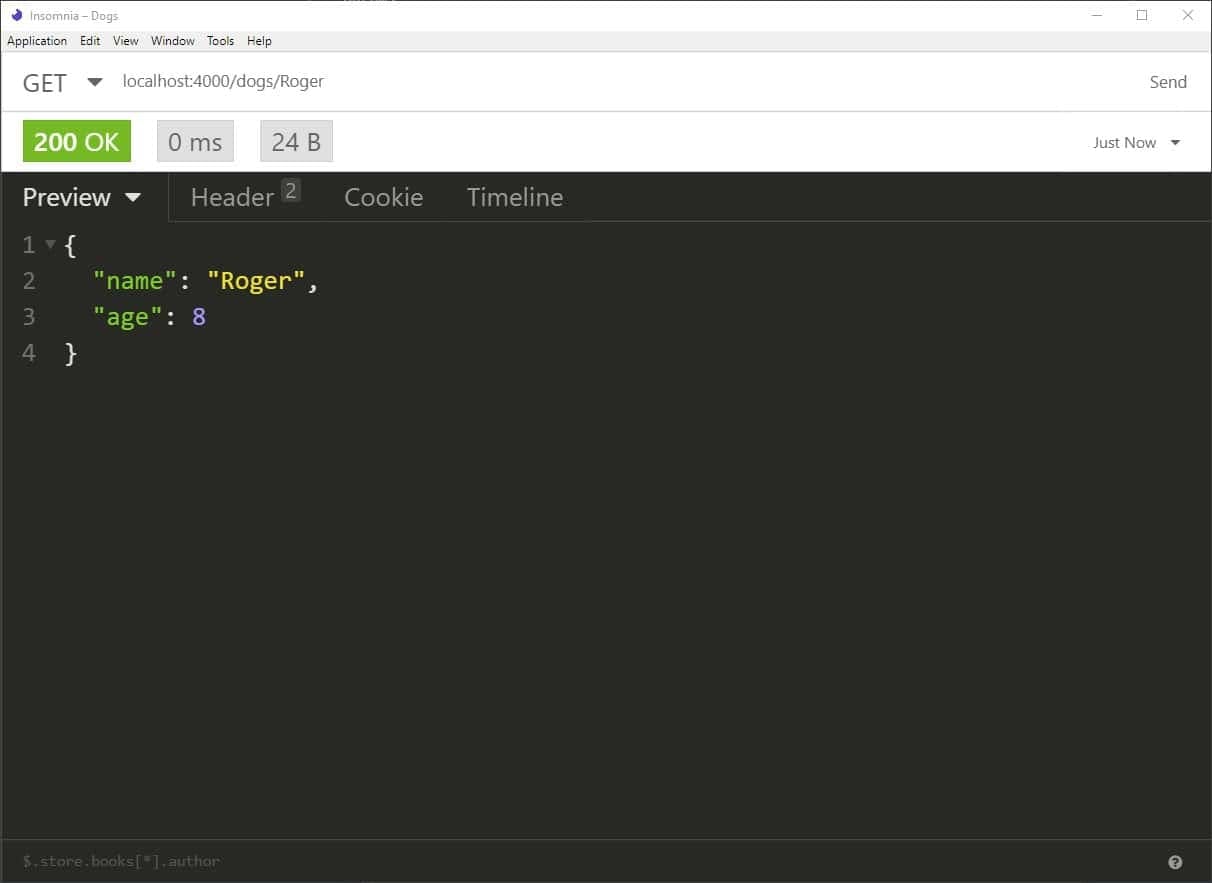
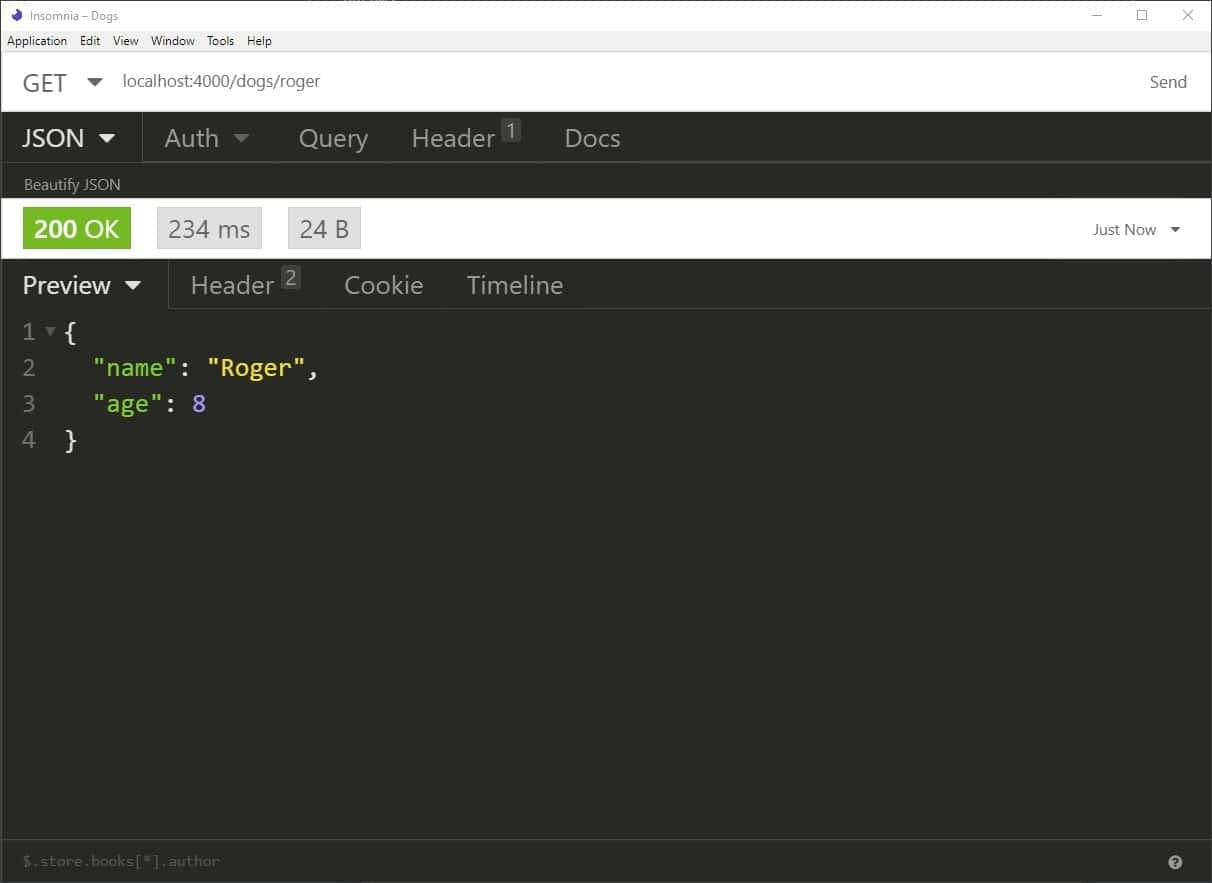
Now we'll save and restart the server again. In Insomnia, We'll be doing a Get request again, but this time we'll include a dog name in the URL. Let's search for “Roger”. This seems to be working just fine:
But if we search for “roger”, with all lowercase, you'll see that we get an error message that the dog could not be found.
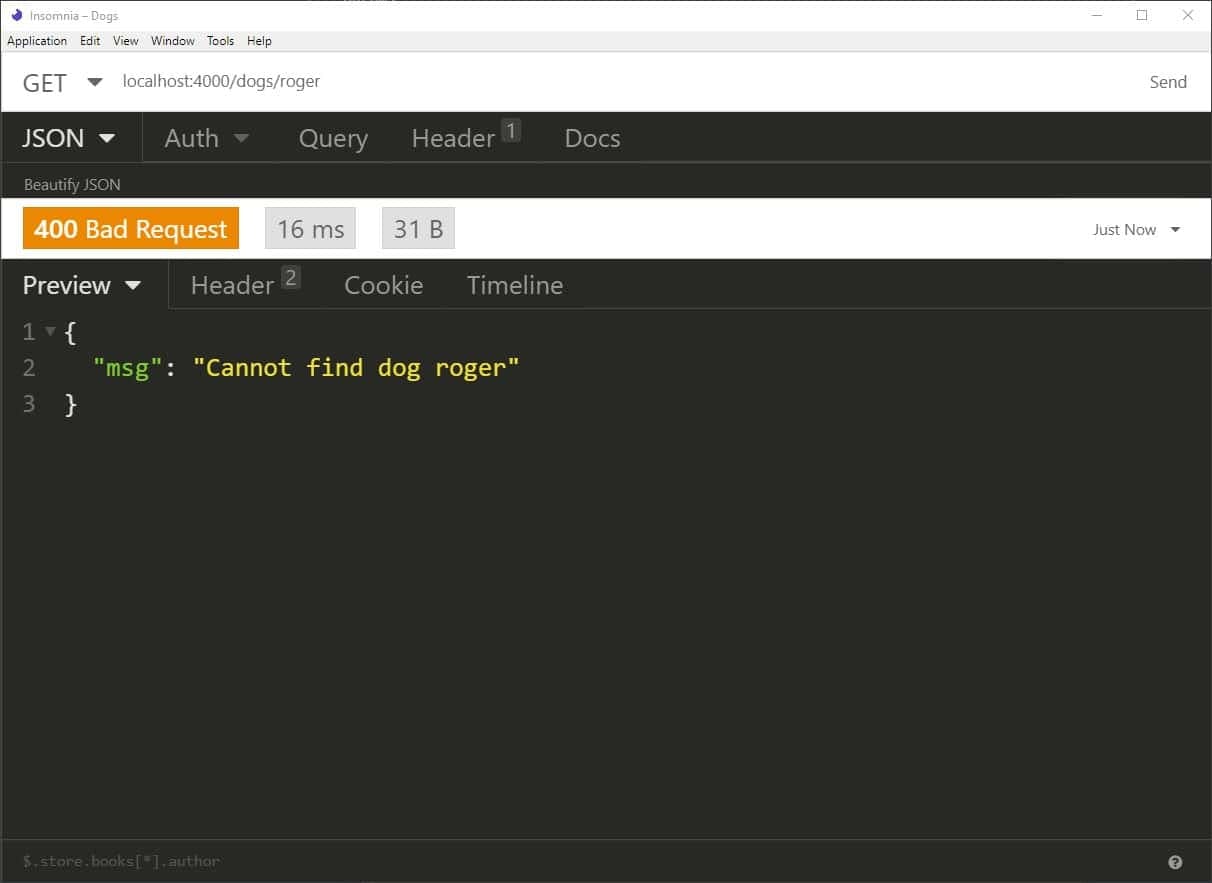
So in order to fix this we simply need to convert each name to lowercase before comparing them.
export const getDog = ({ params, response }) => { const dog = dogs.filter((dog) => dog.name.toLowerCase() === params.name.toLowerCase()) if (dog.length) { response.status = 200 response.body = dog[0] return } response.status = 400 response.body = { msg: `Cannot find dog ${params.name}` }}
Now it's not case sensitive:
Add A New Dog
Now let's implement to new dog function.
export const addDog = async ({ request, response }) => { const body = await request.body() const dog = body.value dogs.push(dog) response.body = { msg: 'OK' } response.status = 200}
Notice here that we are using async / await. Since we are going to be passing data to the server, we need to wait on that response. Again, we'll save and restart the server.
Now let's test this out in Insomnia. We will now be using the POST method. And we'll need to include the JSON data that we are passing to the server.
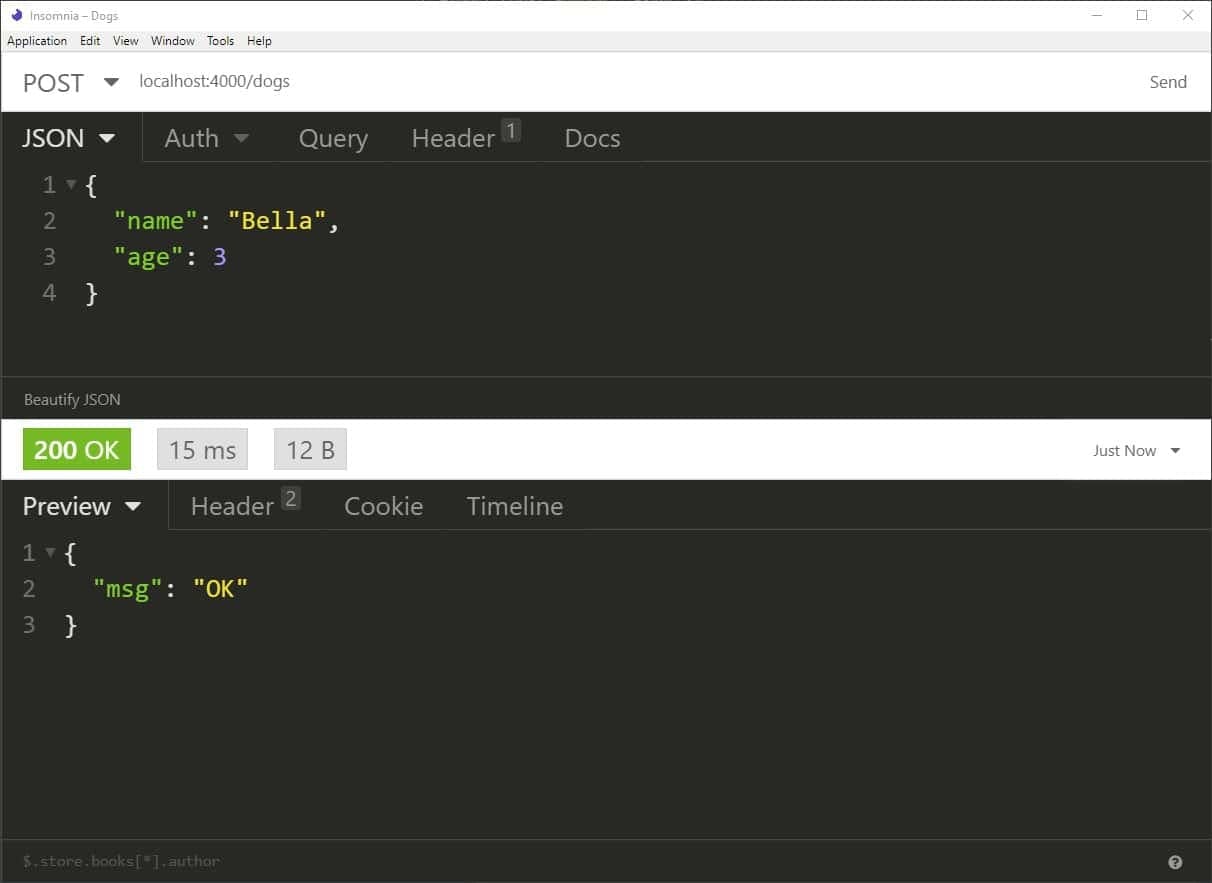
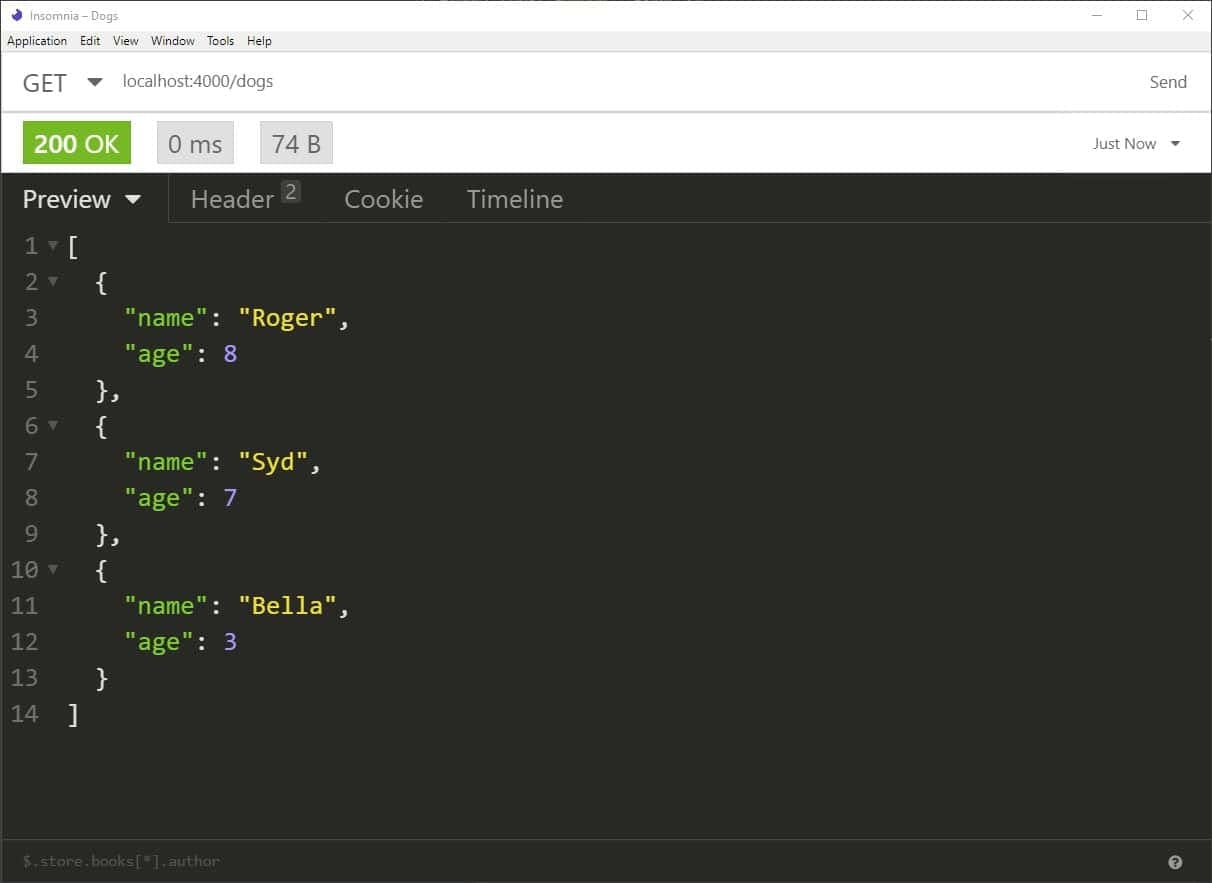
Now if you check all of our dogs we'll see that we have a new dog added.
Update A Dog
Now we'll implement the update function.
export const updateDog = async ({ params, request, response }) => { const temp = dogs.filter((existingDog) => existingDog.name.toLowerCase() === params.name.toLowerCase()) const body = await request.body() const { age } = body.value if (temp.length) { temp[0].age = age response.status = 200 response.body = { msg: 'OK' } return } response.status = 400 response.body = { msg: `Cannot find dog ${params.name}` }}
Again, we will need to wait for the response. So we'll set this up as an async function. And since we only have the dog's age, that's all that we are worried about updating. Let's save and restart the server again.
Back to Insomnia, we'll be using the PUT method this time. Let's enter our JSON data and dog name that we want to update.
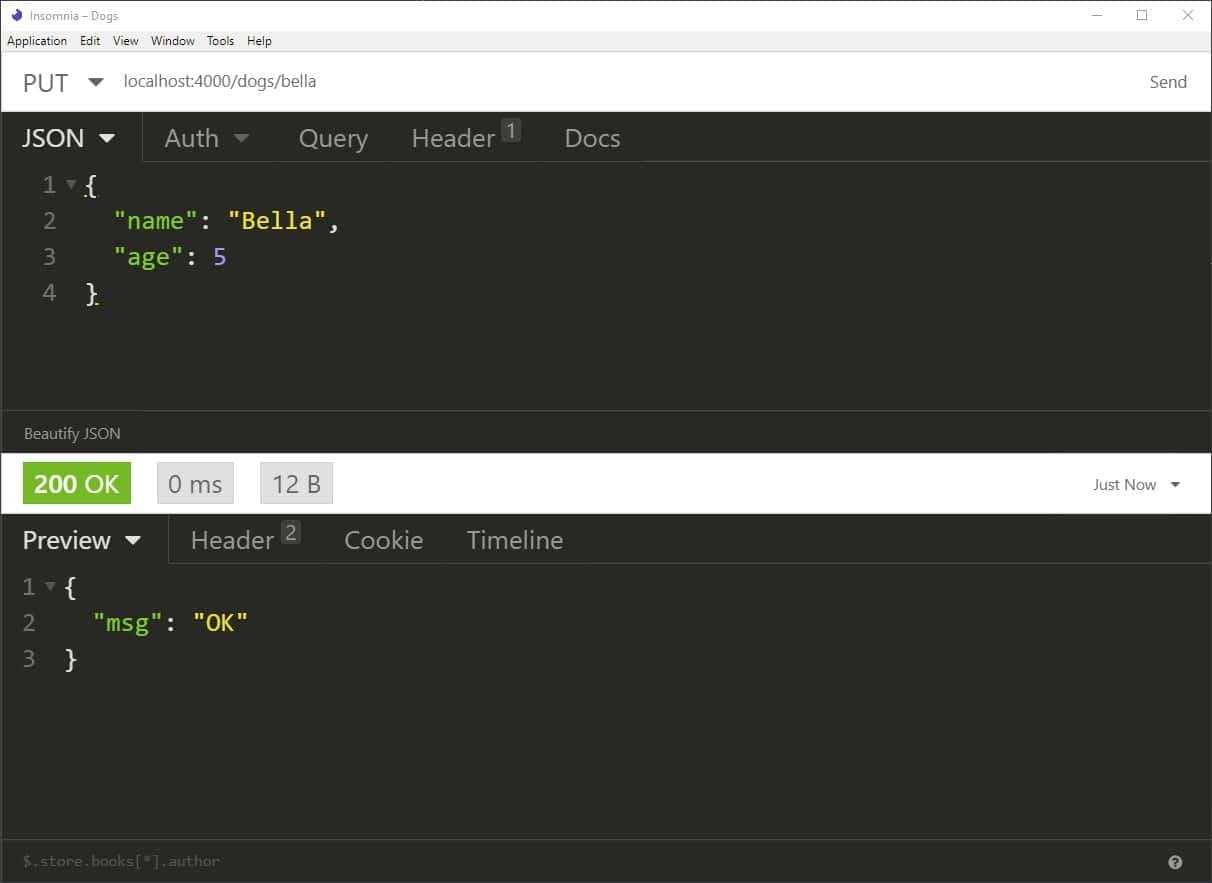
Now we can look at our full list and we'll see that the update has occurred.
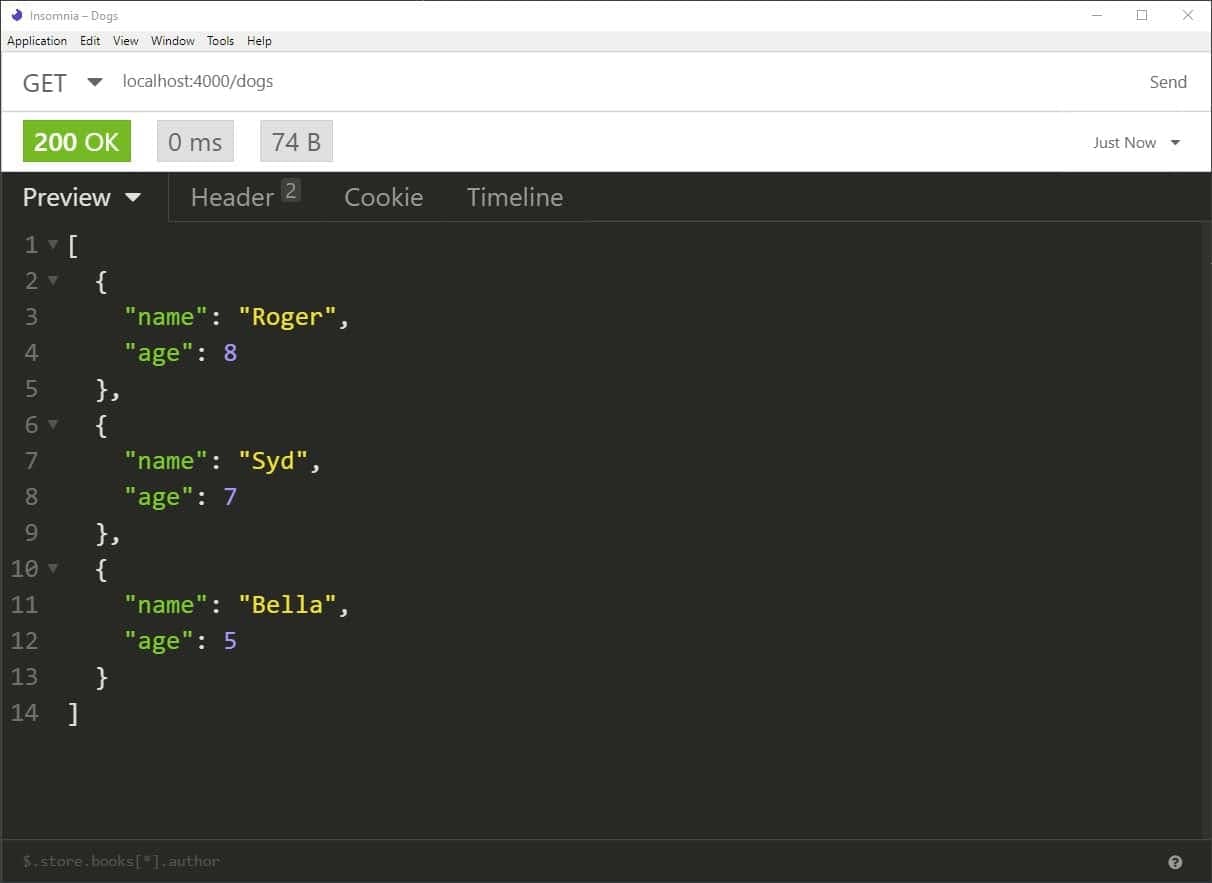
Delete A Dog
Here's our last function to implement. It looks like one of the dogs have to go. We'll set up the delete function:
export const removeDog = ({ params, response }) => { const lengthBefore = dogs.length dogs = dogs.filter((dog) => dog.name.toLowerCase() !== params.name.toLowerCase()) if (dogs.length === lengthBefore) { response.status = 400 response.body = { msg: `Cannot find dog ${params.name}` } return } response.body = { msg: 'OK' } response.status = 200}
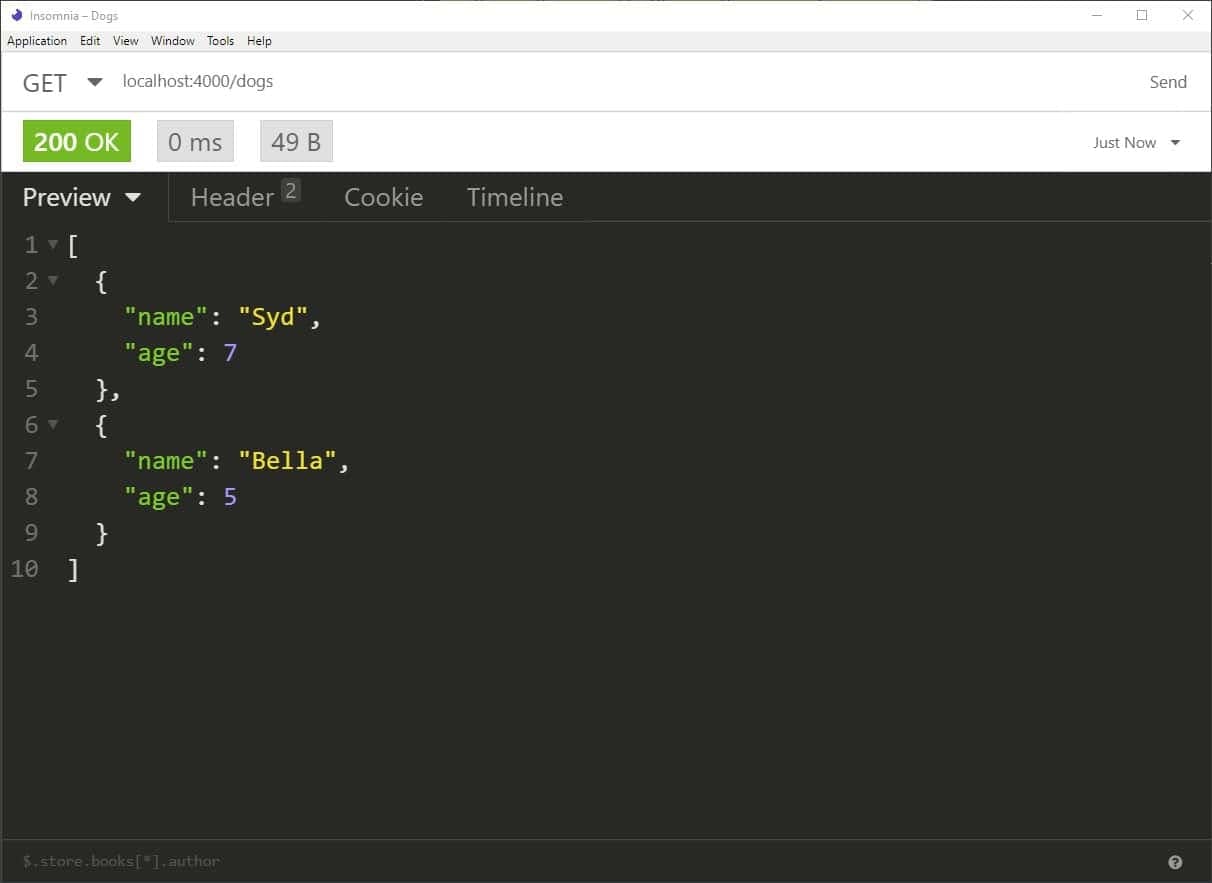
Let's save and restart the server one last time. It looks like Roger is the oldest dog. I guess he has to go. In Insomnia, we are using the DELETE method this time and entering the dog's name in the URL.
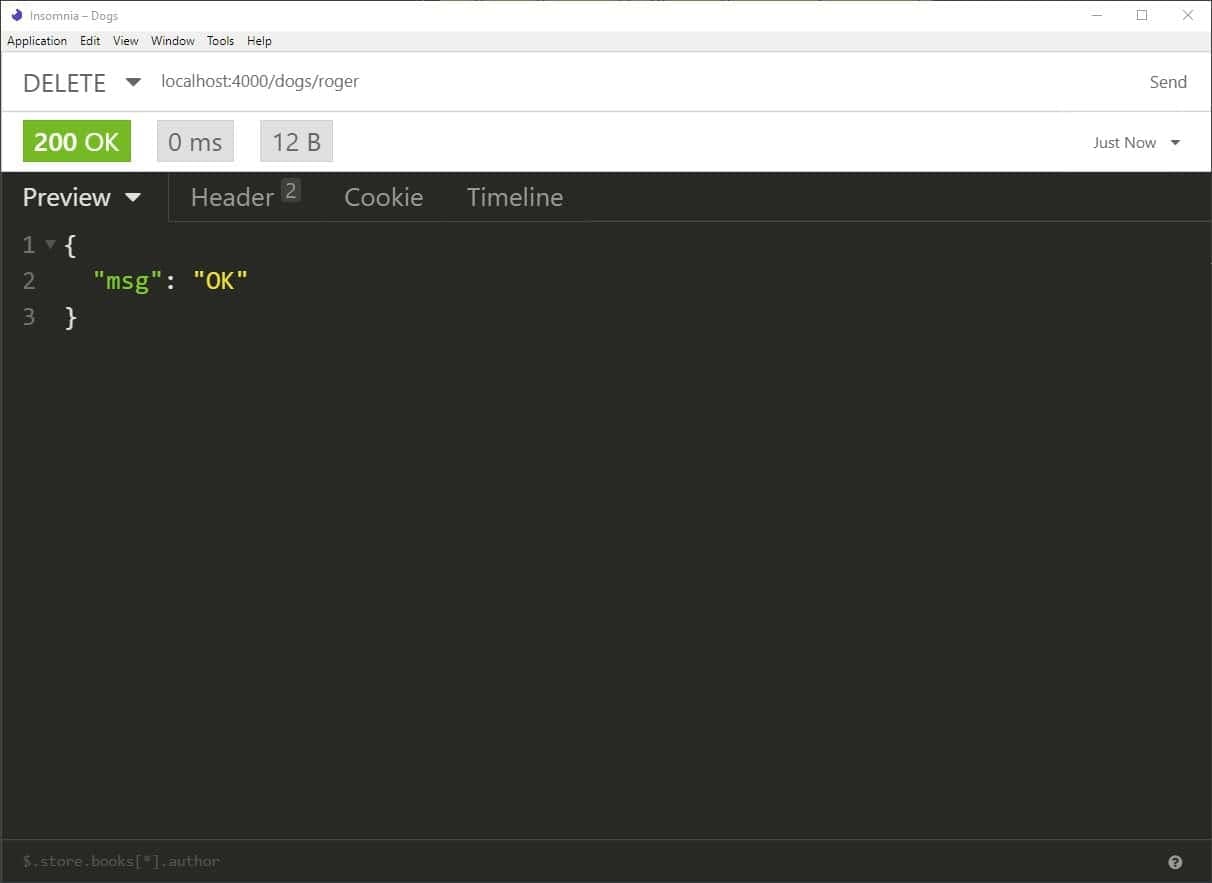
And we'll check the entire list. Roger is gone 🙁
Final Thoughts
Deno is really cool and easy to use. Support for it will only get better over time. I do not think it's ready for production environments but you should definitely try it out in your side projects.
Check out the full video where we build this API using Deno on my YouTube channel:
Help me out by liking this video and subscribing if you haven't already.